Exporting Azure Cost Management data

I assume we all acknowledge the importance of following your cloud spend. And although Azure Portal’s Cost Management and Billing is a great tool for monitoring, allocating and optimizing Azure costs, sometimes there are needs to export the underlying data to be used in another external tool. Or maybe just for archival reasons.
In this blog post I’ll demonstrate how to work with cost management data exports using built-in command line tools, and I’ll be also poking some REST APIs with Postman.
Few notes before we dig into it
Note 1: I’m going to export data out from one of my Pay-as-you-go Azure subscriptions as I don’t have an EA or MCA agreement with Microsoft. This will cut down some of my options during the blog post.
Note 2: I’ll be using my user account both when using the command line tools and Postman. You could, and preferably should, use a service principal with just enough permissions needed for the task. And this is a must when using automation! If you want to know more about assigning permissions to Cost Management APIs, see here. And for more information about the specific permissions needed for the Exports API, check this.
Note 3: I’m expecting that you have some experience on how exports work through Azure Portal. As a quick reminder, exports allow creating tasks that automatically exports Cost Management data to an Azure Blob Storage on a daily, weekly, or monthly basis. Tasks can also be created without recurrence and run manually, just like we are going to do in this post.
Note 4: I have already created a resource group (rg-billingexport-prod), a storage account (strbillingdataprod) and a container in it (billingdata) for the export files.
Note 5: You need to register Microsoft.CostManagementExports resource provider on the subscriptions. You might still receive occasional error messages from Azure about “RP Not Registered”, but just run the command again and usually it succeeds on the second time.
Let’s dig in
I promised to introduce you to both the built-in command line tools and REST API. I’ll start with the command line tools. Let’s first take a look of Powershell, then az cli, and we can then finalize our
Powershell
First make sure you have installed Azure Powershell Az module, then check that you have Az.CostManagement module available (Get-Module -ListAvailable Az.CostManagement. If not, you can install it as an admin with Install-Module Az.CostManagement. After making sure the modules are installed and available, let’s log in to Azure (Login-AzAccount) and start exploring the commands we are interested in.
The obvious first thing we need to do is to create an export. New-AzCostManagementExport allows us to do that. Note that I have removed the subscriptionid. Remember to add yours, and change the name of the resource group and the storage account as well :)
New-AzCostManagementExport `
    -Name "April2023ExportPS" `
    -DefinitionType "Usage" `
    -Scope "/subscriptions/<subscriptionid>" `
    -DestinationResourceId "/subscriptions/<subscriptionId>/resourceGroups/rg-billingexport-prod/providers/Microsoft.Storage/storageAccounts/strbillingexportprod" `
    -DestinationContainer "billingdata" `
    -DestinationRootFolderPath "exports" `
    -DefinitionTimeframe "Custom" `
    -TimePeriodFrom "2023-04-01T00:00:00Z" `
    -TimePeriodTo "2023-04-30T00:00:00Z" `
    -DataSetGranularity "Daily" `
    -Format "csv"
The parameters and their values are mostly self-explanatory. We are giving our export a name, we are getting daily granularity for rows, giving it a scope, a destination and a time period that we are interested on.
Note that I have to use subscription scope with my PAYG subscriptions. If I try to use a management group scope, I will be greeted with the following “No EA Subscriptions for Management Group with managementGroupId: <managementgroupid> were found”.
After running the command, you’ll get an output that looks like this. You will always need the latest ETag value, if you’re going to update the export using Update-AzCostManagementExport.
ETag              Name
----              ----
"1d9ae68e23e77a0" April2023ExportPS
If you now go to the storage account, you might be surprised to see that there isn’t any exported data. The reason being that we only created the export definition, we need to execute it separately. This is where Invoke-AzCostManagementExecuteExport steps in to the game.
Invoke-AzCostManagementExecuteExport `
    -ExportName "April2023ExportPS" `
    -Scope "/subscriptions/<subscriptionid>"
After invoking the execution, we should fairly quickly be able to find this cost management data from the storage account. Now that we know how to do it with Powershell, let’s switch gears and see what az cli provides us with.
Az cli
For az cli, we are going to need costmanagement extension. The extension will automatically install the first time you run an az costmanagement command. As you can see the command and the parameters match quite nicely with the PS one.
$ az costmanagement export create \
    --name "April2023ExportCLI" \
    --type "Usage" \
    --scope "/subscriptions/<subscriptionid>" \
    --storage-account-id="/subscriptions/<subscriptionid>/resourceGroups/rg-billingexport-prod/providers/Microsoft.Storage/storageAccounts/strbillingexportprod" \
    --storage-container="billingdata" \
    --storage-directory="exports" \
    --timeframe "Custom" \
    --time-period from="2023-04-01T00:00:00Z" to="2023-04-30T00:00:00Z"
In case you do not have costmanagement extension installed, you are first presented with the question to install the extension. “The command requires the extension costmanagement. Do you want to install it now? The command will continue to run after the extension is installed. (Y/n)”
With az cli, the response is much longer.
{
  "definition": {
    "dataSet": {
      "configuration": null,
      "granularity": "Daily"
    },
    "timePeriod": {
      "fromProperty": "2023-04-01T00:00:00+00:00",
      "to": "2023-04-30T00:00:00+00:00"
    },
    "timeframe": "Custom",
    "type": "Usage"
  },
  "deliveryInfo": {
    "destination": {
      "container": "billingdata",
      "resourceId": "/subscriptions/<subscriptionid>/resourceGroups/rg-billingexport-prod/providers/Microsoft.Storage/storageAccounts/strbillingexportprod",
      "rootFolderPath": "billingdata"
    }
  },
  "eTag": "\"1d9ae6ca6352d7a\"",
  "format": "Csv",
  "id": "subscriptions/<subscriptionid>/providers/Microsoft.CostManagement/exports/April2023ExportCLI",
  "name": "April2023ExportCLI",
  "nextRunTimeEstimate": null,
  "runHistory": null,
  "schedule": {
    "recurrence": null,
    "recurrencePeriod": null,
    "status": "Inactive"
  },
  "type": "Microsoft.CostManagement/exports"
}
Now that we have the export definition created, let’s invoke it. But wait, there is no az costmanagement export invoke command available. We could play around with schedules, but let’s skip that and get straight to the last option, REST APIs with Postman.
REST API
Being able to work with the REST APIs with Postman, I’ll need an access token. We can grab one using either cli az account get-access-token or Powershell Get-AzAccessToken. The token itself will be a monstrous string starting with “eyJ0eXAiOi…”
If we take a look of the documentation, we can see that for being able to create an export using REST API, we need to provide some URI parameters and a request body.
I’ll follow the previous examples and use the subscription scope and a matching name.
PUT https://management.azure.com/subscriptions/<subscriptionid>/providers/Microsoft.CostManagement/exports/April2023ExportAPI?api-version=2023-03-01
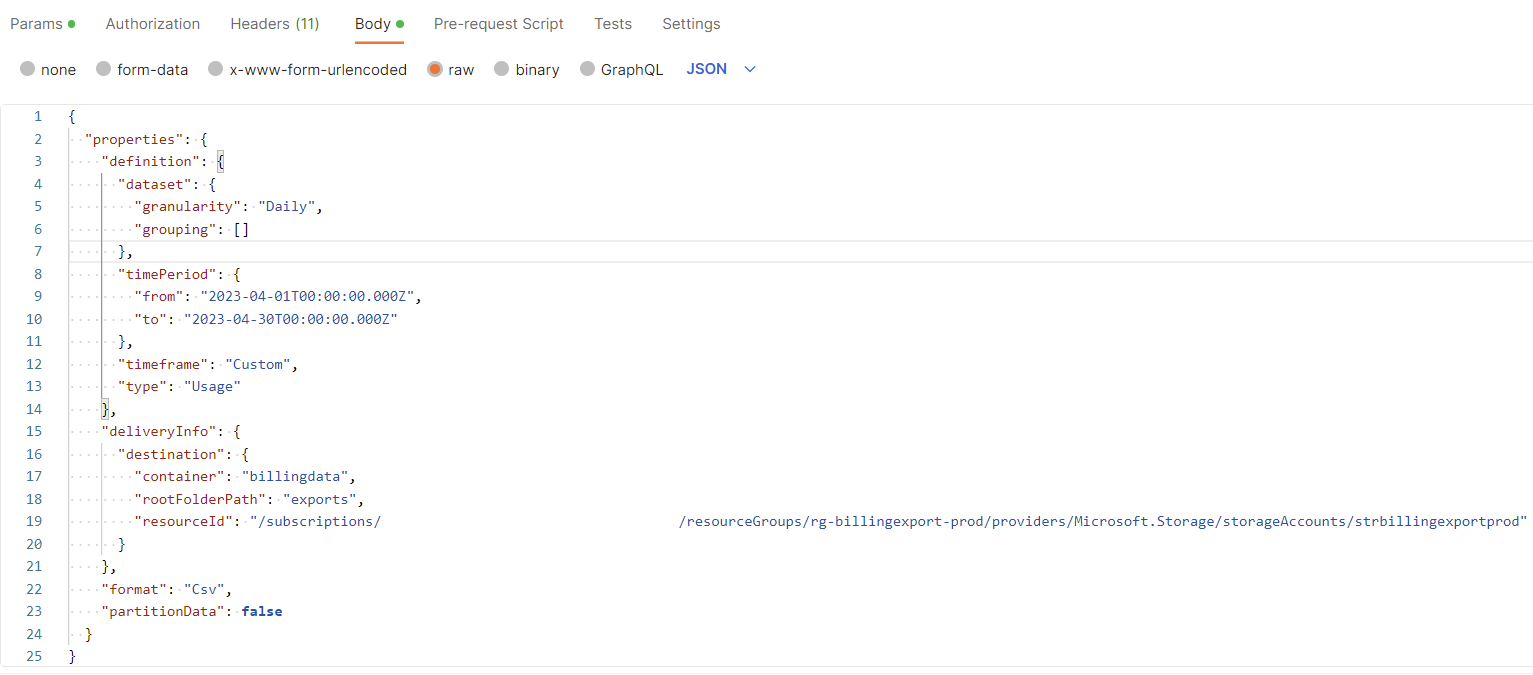
As far as the request body goes, it looks awfully familiar with the output we received when using az cli. The parameters and values should already look familiar enough, so let’s no waste time to go through them.
{
  "properties": {
    "definition": {
      "dataset": {
        "granularity": "Daily",
        "grouping": []
      },
      "timePeriod": {
        "from": "2023-04-01T00:00:00.000Z",
        "to": "2023-04-30T00:00:00.000Z"
      },
      "timeframe": "Custom",
      "type": "Usage"
    },
    "deliveryInfo": {
      "destination": {
        "container": "billingdata",
        "rootFolderPath": "exports",
        "resourceId": "/subscriptions/<subscriptionid>/resourceGroups/rg-billingexport-prod/providers/Microsoft.Storage/storageAccounts/strbillingexportprod"
      }
    },
    "format": "Csv",
    "partitionData": false
  }
}
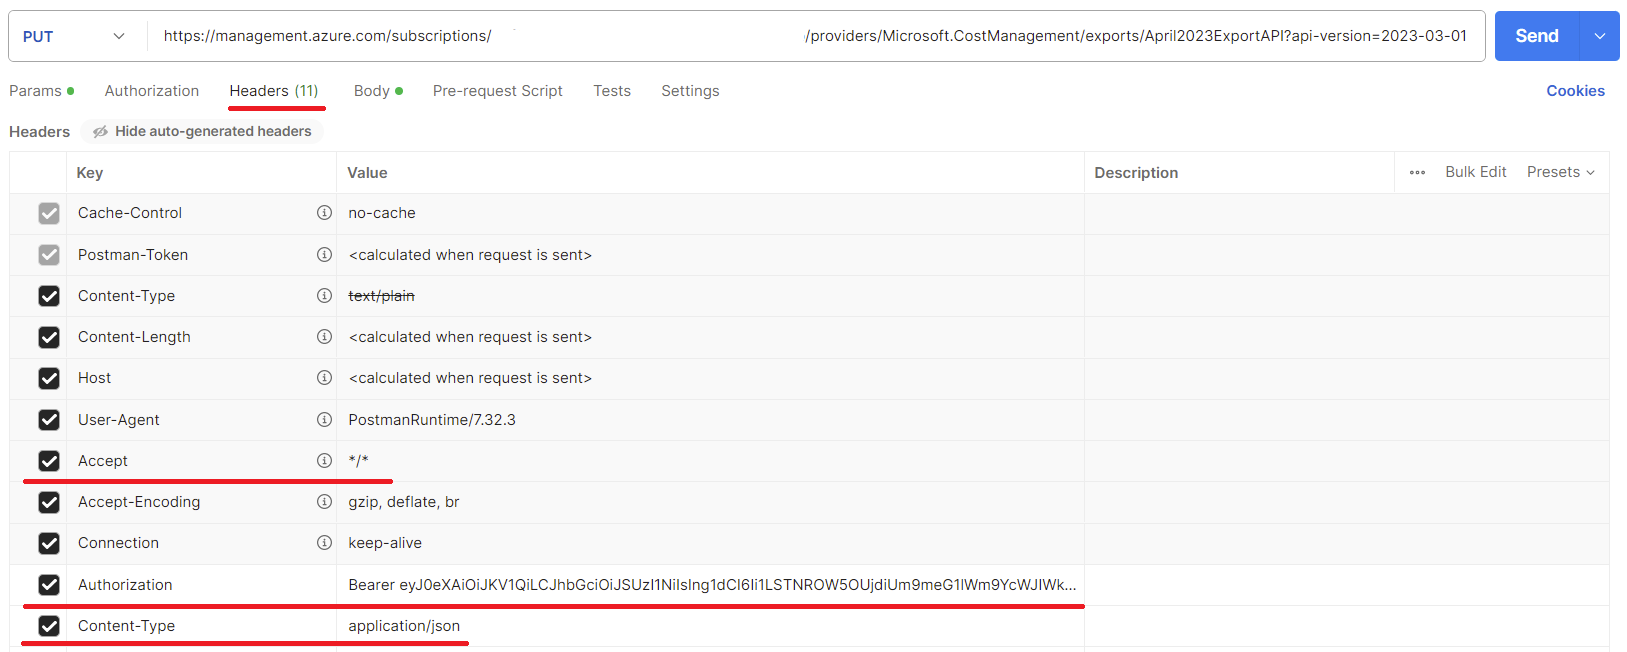
Before interacting with the API, remember to set these Request Headers in Postman.

Authorization: Bearer eyJ0eXAiOi...
Accept: /*/
Content-Type: application/json

Once you have set the request headers and the request body, feel free to execute the request as PUT. You should receive a similir json output as we did with az cli, and a response of Status 201 Created.
Now that we have the export definition in place, let’s execute it as POST. There’s no need for the request body nor the Content-Type header for this API request.
POST https://management.azure.com/subscriptions/<subscriptionid>/providers/Microsoft.CostManagement/exports/April2023ExportAPI/run?api-version=2023-03-01
If everything goes fine, you should receive a Status 200 OK response. Let’s also execute the export that was created with az cli.
POST https://management.azure.com/subscriptions/<subscriptionid>/providers/Microsoft.CostManagement/exports/April2023ExportCLI/run?api-version=2023-03-01
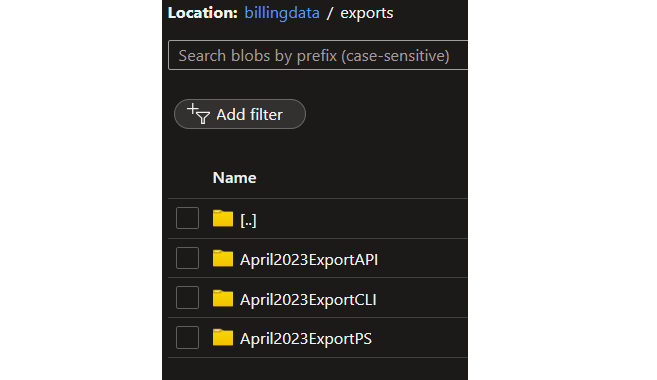
After receiving another 200 OK, let’s check the storage account. We can see that all the exports have been created in their own subfolders that correspond to the names of export. Actually, those are virtual directories, not subfolders, as the account does not have hierarchical namespace enabled. But that’s a different story. You can read more about the topic on MS Learn.

That’s it for now. Feel free to remove the export definitions and the actual csv-files created, if you don’t need them.
Over and out
What did we learn today? We had a look of how to create and execute cost management data exports. At least I was a bit surprised that there was no option for executing the exports using az cli. Luckily there are other options like Powershell and REST API, and most probably az costmanagement extension will get an update later on that supports the execution part.